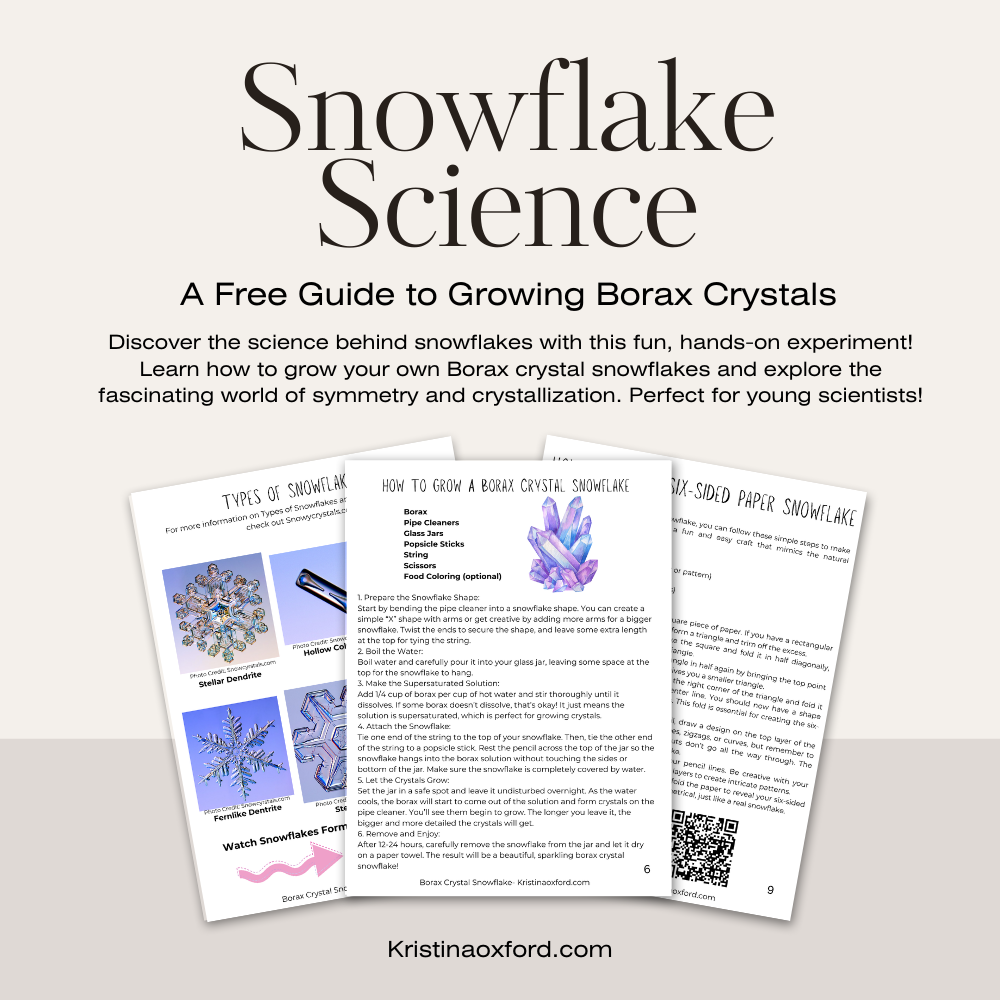
Learn how to grow a borax crystal snowflake. Making a borax crystal snowflake is the perfect fun and educational winter craft to try with your kids! Not only do you end up with beautiful, sparkly decorations, but it’s also a hands-on science experiment that teaches kids about supersaturated solutions and crystal formation.
This post contains affiliate links. For more information check out my Privacy Page.

What is borax?
Borax, also known as sodium borate, is a naturally occurring mineral that has a wide range of uses. For example, it’s often found in cleaning products, DIY crafts, and science experiments.
Additionally, it’s well-known for its ability to dissolve easily in water, which is why it’s such a key ingredient in activities like making slime or growing crystals.
In our borax crystal snowflake experiments, borax is particularly effective because it’s highly soluble in hot water. As the solution cools, the borax molecules rearrange themselves into intricate, geometric patterns, resulting in stunning crystals.
Fun Fact About Borax Crystals
Borax naturally forms monoclinic crystals, which is a fancy way of saying they have jagged, angular shapes. This is why your snowflakes end up looking so sparkly and detailed!
Where Can You Find Borax?
Borax is easy to find—it’s typically sold in the laundry aisle of most stores. Although it is safe to use in small amounts for projects, it’s still important to supervise children during activities and ensure they don’t ingest it. With its versatility and unique properties, borax is a must-have for anyone looking to combine crafting and learning.
Check out more fun activities!
The Science of Growing a Borax Crystal
Growing borax crystals is a fun experiment that demonstrates how molecules in a supersaturated solution come together to form a solid structure. Here’s how it works:
What is a supersaturated solution?
When you stir borax into super-hot water, the heat makes the water molecules spread out. This lets the water hold more borax than it normally could at room temperature. When the water can’t dissolve any more borax, it’s called a supersaturated solution.
The hotter the water, the more borax can be dissolved making the super-saturated solution. This means that when the water cools, there’s more borax available to form crystals. This will give you bigger and shinier crystals.
How Do Crystals Form?
As the water cools, those water molecules start to slow down and can’t hold onto all that borax anymore. The extra borax has to go somewhere, so it starts sticking together in a repeating pattern. If you’ve given it something to grab onto—like a pipe cleaner snowflake—it uses that as a base to grow. That’s why crystals form on the pipe cleaner and not just floating in the water.

How long does a borax crystal last?
Borax crystals are pretty sturdy once they’ve formed, but how long they last depends on the environment. If stored properly, they can last for months or even years. These crystals won’t degrade over time, but they can be affected by humidity, temperature, or rough handling.
To store your borax crystals and ensure they last, follow these tips:
1. Keep them in a dry place – Humidity can cause the crystals to dissolve or break down over time, so it’s best to keep them in a dry spot away from any moisture.
2. Store them in a sealed container – A box, jar, or display case with a tight lid will protect the crystals from dust and moisture.
3. Handle with care – Although borax crystals are relatively sturdy, they can break if dropped or handled too roughly. Try to keep them in a safe spot where they won’t get knocked around.
Safety Measures for Using Borax with Kids
Using borax in crafts like crystal snowflakes can be fun and educational, but it’s important to keep safety in mind, especially when kids are involved. Here are a few simple tips:
- Supervise the Activity: Always keep an eye on children while they’re working with borax to ensure they follow instructions.
- No Tasting! Remind kids that borax is a chemical and should never be ingested. Wash hands thoroughly after handling.
- Protect Skin and Eyes: If your child has sensitive skin, consider using gloves. Goggles are also a good idea to avoid accidental splashes.
- Store Safely: Keep borax in a sealed container, out of reach of kids and pets when not in use.
- Clean Up Thoroughly: Wipe down surfaces and wash tools well after the project to ensure no residue is left behind.
For more safety information head over to 20 Mule Team.

Borax Crystal Snowflake Materials
- Borax
- Pipe Cleaners
- Glass Jars
- Popsicle Sticks
- String
- Scissors
- Food Coloring (optional)
1. Prepare the Snowflake Shape:
Start by bending the pipe cleaner into a snowflake shape. You can create a simple “X” shape with arms or get creative by adding more arms for a bigger snowflake. Twist the ends to secure the shape, and leave some extra length at the top for tying the string.

2. Boil the Water:
Boil 1 cup of water and carefully pour it into your glass jar, leaving some space at the top for the snowflake to hang.
3. Make the Supersaturated Solution:
Add 1/4 cup of borax to the hot water and stir thoroughly until it dissolves. If some borax doesn’t dissolve, that’s okay! It just means the solution is supersaturated, which is perfect for growing crystals.

4. Attach the Snowflake:
Tie one end of the string to the top of your snowflake. Then, tie the other end of the string to a popsicle stick. Rest the pencil across the top of the jar so the snowflake hangs into the borax solution without touching the sides or bottom of the jar. Make sure the snowflake is completely covered by water.

5. Let the Crystals Grow:
Set the jar in a safe spot and leave it undisturbed overnight. As the water cools, the borax will start to come out of the solution and form crystals on the pipe cleaner. You’ll see them begin to grow. The longer you leave it, the bigger and more detailed the crystals will get.
6. Remove and Enjoy:
After 12-24 hours, carefully remove the snowflake from the jar and let it dry on a paper towel. The result will be a beautiful, sparkling borax crystal snowflake!
Reusing Your Borax Solution
After completing your first batch of crystal snowflakes you can reuse the solution over and over. Just reheat the solution to boiling again so that the crystals dissolve into to water. Add more water or borax as needed. Here are some ideas for reusing the solution:
- Grow crystals on different shapes like stars, hearts, or even letters.
- Experiment with food coloring to create vibrant, colored crystals.
How to Properly Dispose of the Borax Crystal Growing Solution
After you’ve enjoyed your beautiful borax crystal snowflakes, it’s time to dispose of the solution safely to keep both your plumbing and the environment in mind.
Option 1: Throw It Away
The easiest and safest option is to let the borax solution cool down, then simply throw it in the trash. While borax is a naturally occurring mineral, it can harm local water systems if it enters them in large amounts, so avoid pouring it down the drain.
Option 2: Dilute and Pour Down the Drain
If you’d prefer not to throw it out, you can dilute the solution with plenty of water. This lowers the concentration, making it safer to pour down the drain. Just remember to do it in small amounts—large quantities could still cause issues, so take it slow.
Option 3: Check Local Guidelines
If you’re unsure, it’s always a good idea to check with your local waste disposal authorities for specific instructions. Some areas may have special rules for safely disposing of non-toxic substances like borax.
Pin for later!


Borax Crystal Snowflakes
Ingredients
- Borax
- Pipe Cleaners
- Glass Jars
- Popsicle Sticks
- String
- Scissors
- Food Coloring (optional)
Instructions
1. Prepare the Snowflake Shape:
Start by bending the pipe cleaner into a snowflake shape. You can create a simple “X” shape with arms or get creative by adding more arms for a bigger snowflake. Twist the ends to secure the shape, and leave some extra length at the top for tying the string.
2. Boil the Water:
Boil water and carefully pour it into your glass jar, leaving some space at the top for the snowflake to hang.
3. Make the Supersaturated Solution:
For every cup of water add 1/4 cup of borax to the hot water and stir thoroughly until it dissolves. If some borax doesn’t dissolve, that’s okay! It just means the solution is supersaturated, which is perfect for growing crystals.
4. Attach the Snowflake:
Tie one end of the string to the top of your pipe cleaner snowflake. Then, tie the other end of the string to a popsicle stick. Rest the pencil across the top of the jar so the snowflake hangs into the borax solution without touching the sides or bottom of the jar. Make sure the snowflake is completely covered by water.
5. Let the Crystals Grow:
Set the jar in a safe spot and leave it undisturbed overnight. As the water cools, the borax will start to come out of the solution and form crystals on the pipe cleaner. You’ll see them begin to grow. The longer you leave it, the bigger and more detailed the crystals will get.
6. Remove and Enjoy:
After 12-24 hours, carefully remove the snowflake from the jar and let it dry on a paper towel. The result will be a beautiful, sparkling borax crystal snowflake!

How fun! What a fun science experiment!